In this post we will be looking at how we can create a mysql database instance on aws rds and connect to it from local machine to do sql operations.
Amazon Relational Database Service (Amazon RDS) makes it easy to set up, operate, and scale a relational database in the cloud. It provides you with complete administrative and data management capabilities, without software or hardware to install. Amazon RDS provides you with the tools to launch and manage a MySQL or MariaDB database in the cloud.
The database engines provided by Amazon RDS include MySQL, MariaDB, PostgreSQL, amazon aurora, Microsoft sql server and Oracle.
This tutorial shows you how to create a MySQL database instance on Amazon RDS and connect to it from local machine to perform queries.
Create a mysql database on aws rds
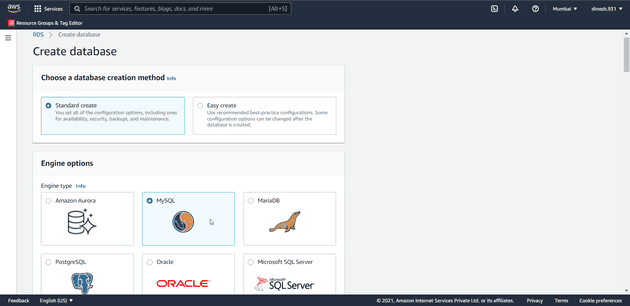
Go to the AWS RDS console and click on the Create database button.

In Standard create select mysql as database engine
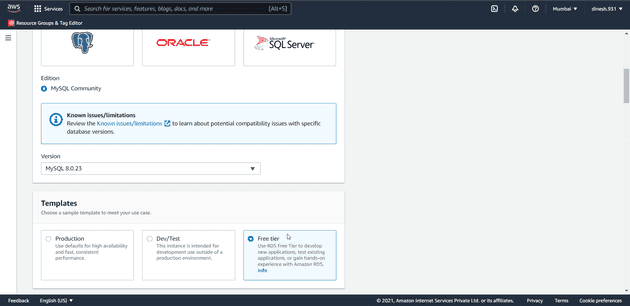
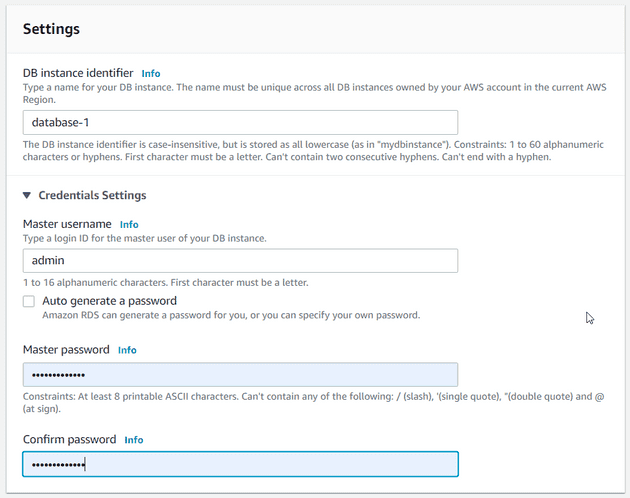
Change only the below mentioned fields and keep everything else as default.
In Templates section select free tier.
Enter a password for the database be sure to make a note of your password as we will need it later to connect to the database.
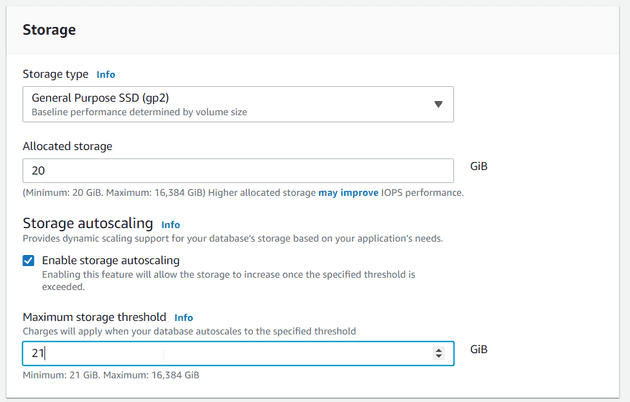
It is better to disable storage autoscaling if just testing the database
but if you need it then decrease the maximum storage size to prevent unexpected costs.
In the connection section set the public access parameter to yes.
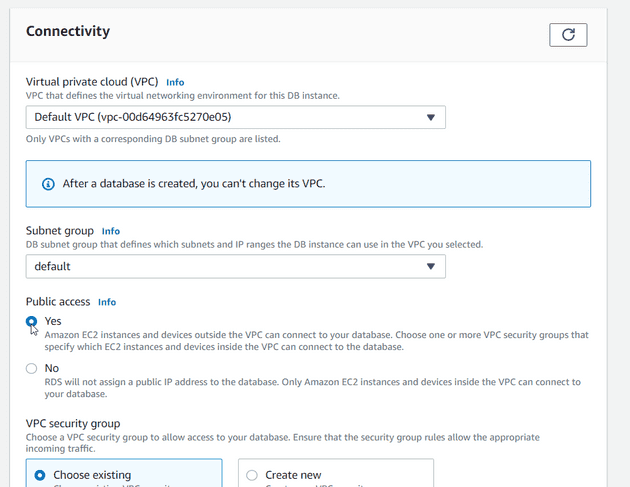
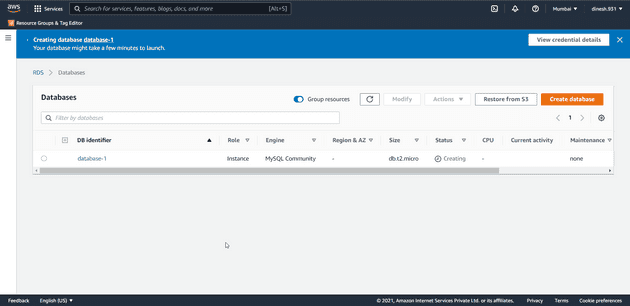
Keep all the remaining fields as default and select the Create database button at the bottom of the page to create the database.
Now you can see that your database is being created.
Get the endpoint of your aws rds database
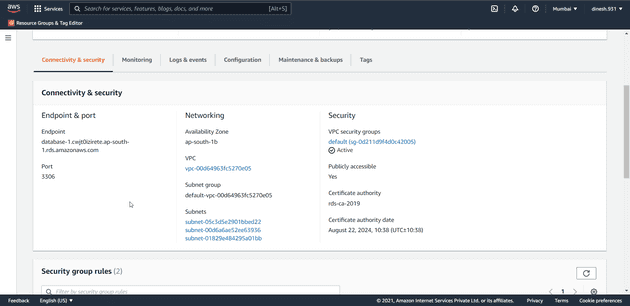
After the database is created you can get the endpoint of your database to connect to the database.
To get the endpoint of your database go to the AWS RDS console and click on the databases tab
From the databases tab click on the database name you want the endpoint of.
There in the connectiviy section you can see the endpoint and port number of your database.
Edit security rules to allow inbound traffic
Click on the security group in the Connectivity and Security section.
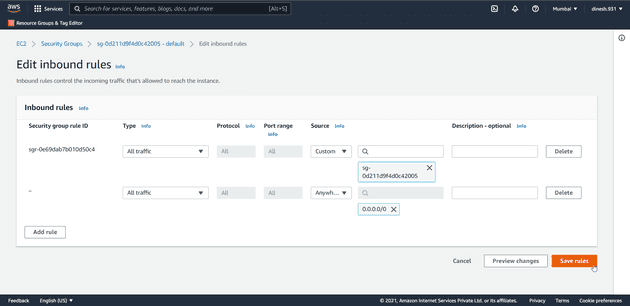
Go to inbound rules and click on the edit inbound rules button.
Add rule to allow inbound traffic to your database.
Click on Add rule button.
Set Type as All traffic
Source as anywhere ipv4
Now click on Save rules button to save the changes.
Connect to mysql database from local machine using mysql workbench
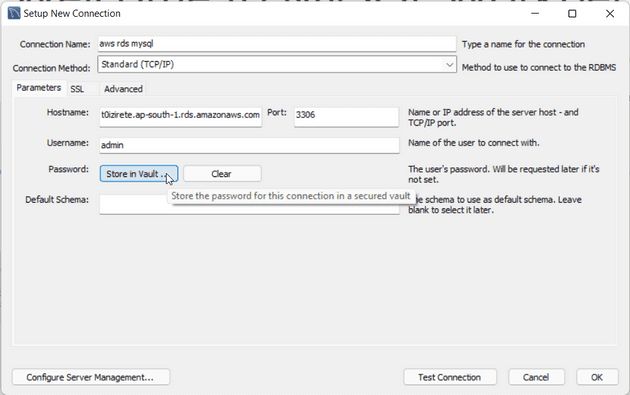
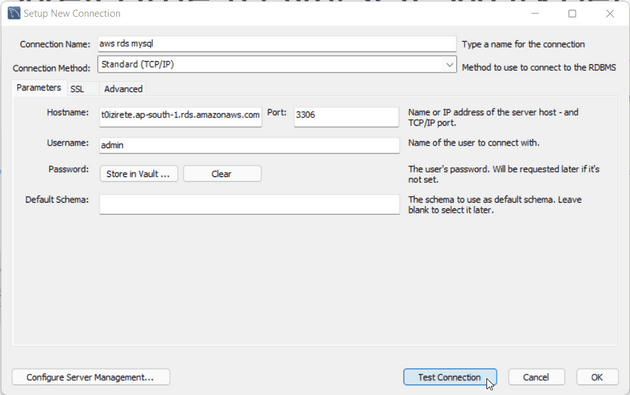
Open the mysql workbench and click on new connection
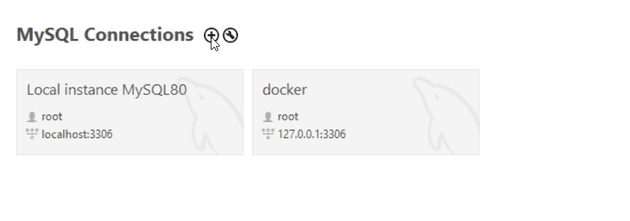
Enter the connection name of your choice
Enter the hostname of your database that is the database endpoint
Enter username that we set at the time of creating the database
There is a high chance of it being admin
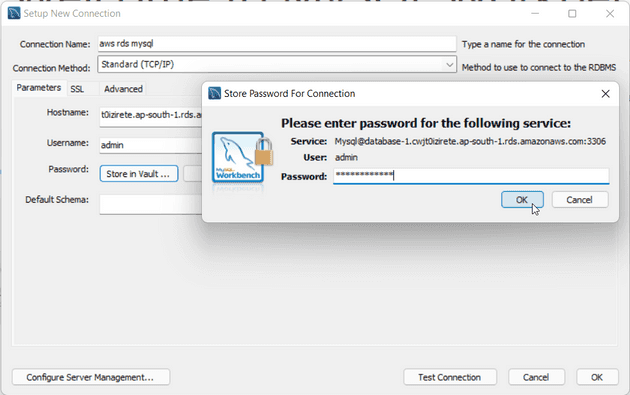
Click on store in vault and enter your password that we set at the time of creating the database
and click ok
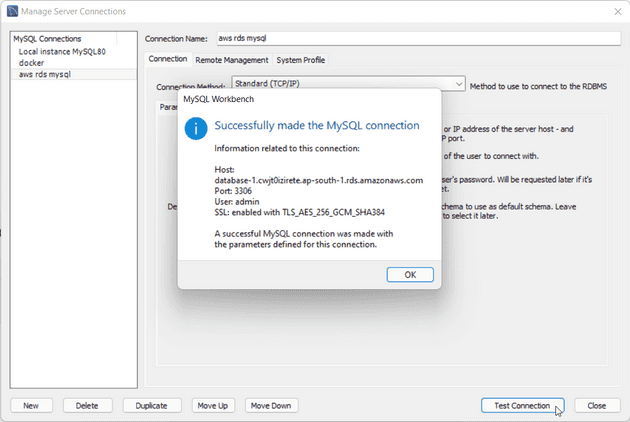
Click on Test connection button to test the connection
If everything went fine you will see the following message
Click ok and close the prompts
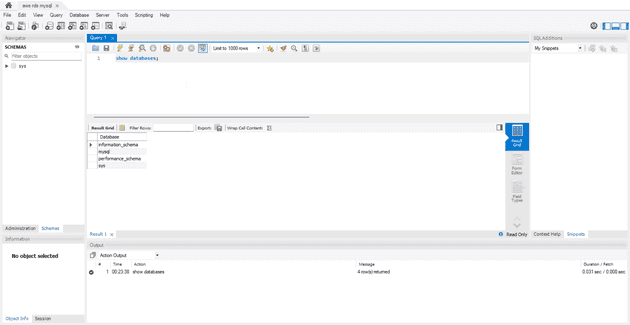
You can now see the new database in the MySql Connections tab in the mysql workbench.

click on it to perform sql operations.
You have successfully connected to a aws rds mysql database from your local machine using mysql workbench and run sql queries on it.
