In this tutorial I will walk you through on how to add the jdbc drivers to your class path and how to properly execute your java programs that have database connections.
if you prefer the video version
Check your database is properly installed and running
I will be using oracle database xe but the procedure is basically same for any other database.
Open the terminal of your database and login
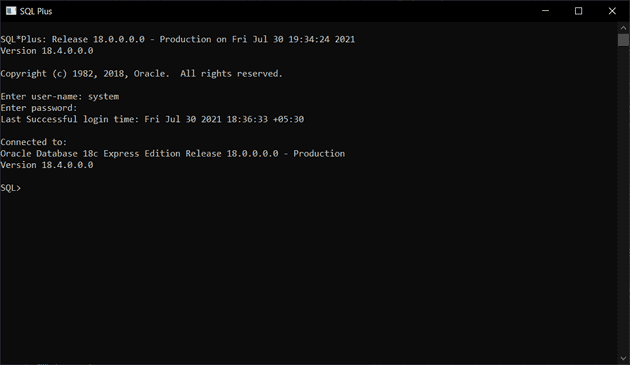
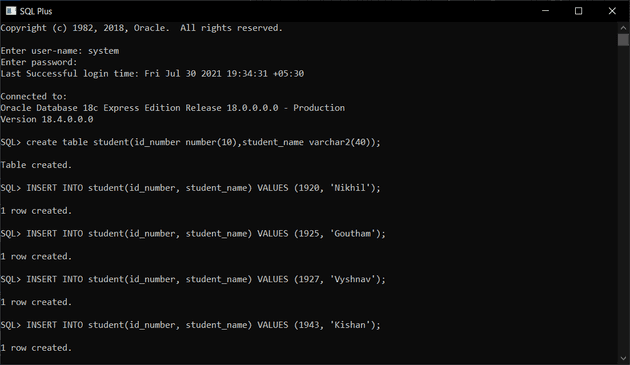
As you can see I succesfully logged in the sql plus command prompt and this confirms that the database is properly installed and running.
Create a table
The following sql command will create a new table in the oracle sql database.
create table student(id_number number(10),student_name varchar2(40));Insert data into the student table
After the table is created run the following commands to insert some student data into the student table.
INSERT INTO student(id_number, student_name) VALUES (1920, 'Nikhil');
INSERT INTO student(id_number, student_name) VALUES (1925, 'Goutham');
INSERT INTO student(id_number, student_name) VALUES (1927, 'Vyshnav');
INSERT INTO student(id_number, student_name) VALUES (1943, 'Kishan');
Why did we create a new table and insert some data into it?
It is because this table will be standard and will be available when we run the program and also running this commands makes sure that the database is properly working
create a java project
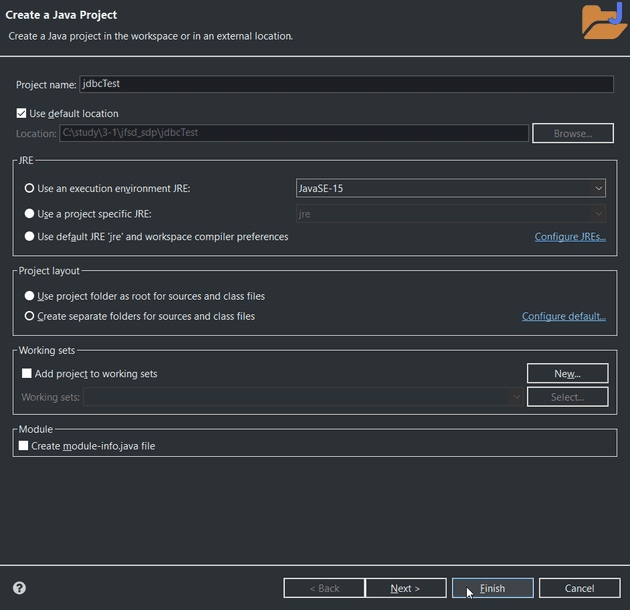
Now let’s create a new java project in eclipse go on and click on the new java project button on the top left corner of your eclipse or you can click on File -> New -> Java project
Let’s name this jdbcTest and click Finish
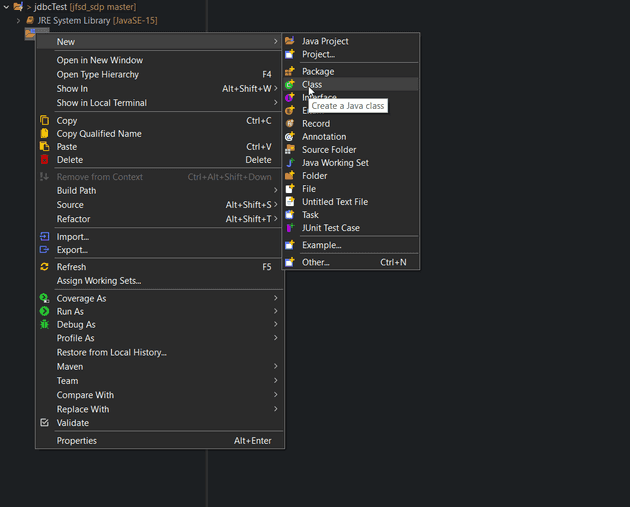
Now our java project is ready you can view the file structure on the left panel right click on the src folder then go New -> Class
This will create a new java class, Let’s name it Main then click finish
Paste the following code into your Main.java file
//Step 1 : import java.sql package
import java.sql.*;

public class jdbctemplate {
    public static void main(String[] args) throws Exception {
        try {
            // Step 2 load the driver class
            Class.forName("oracle.jdbc.driver.OracleDriver");

            String dbUserName = "system";// your user name goes here

            String dbUserPassword = "nikhil";// your password goes here

            // step 3 create the connection object
            Connection con = DriverManager.getConnection("jdbc:oracle:thin:@localhost:1521:XE", dbUserName,
                    dbUserPassword);

            // step 4 create the statement object
            Statement stmt = con.createStatement();

            /*
             * step 5 Now the connection has been established succesfully Now you can
             * execute your necessary commands here
             */

            ResultSet rs = stmt.executeQuery("select * from student");
            while (rs.next())
                System.out.println(rs.getInt(1) + "  " + rs.getString(2));

        } catch (Exception e) {
            System.out.println("Error: " + e);
        }
    }
}
Add ojdbc driver to the classpath
You can download the OJDBC driver for the oracle database from oracle
Now that you have the OJDBC driver right click on the Main.java
file from there on Build path -> Configure Build path
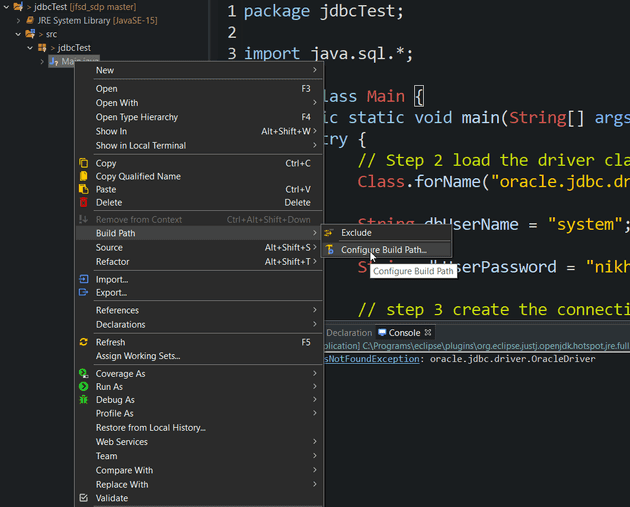
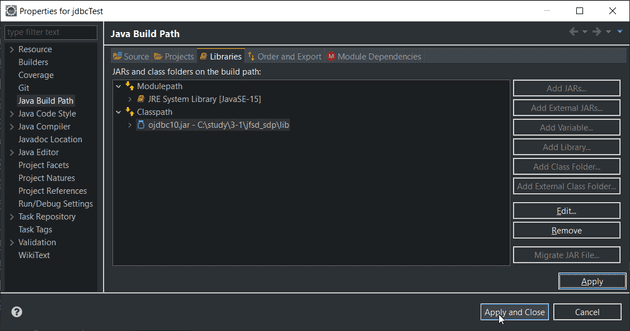
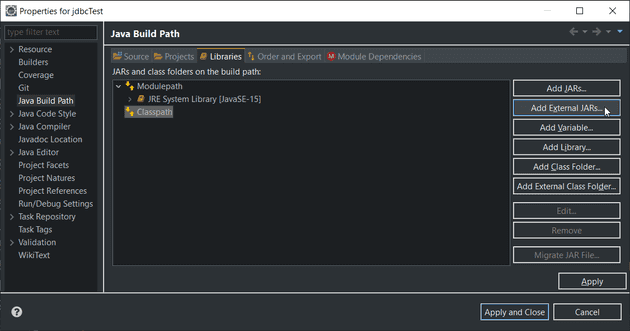
In the menu that appears click on libraries.
Inside the libraries select class path and then in the right menu
click on Add External JARs
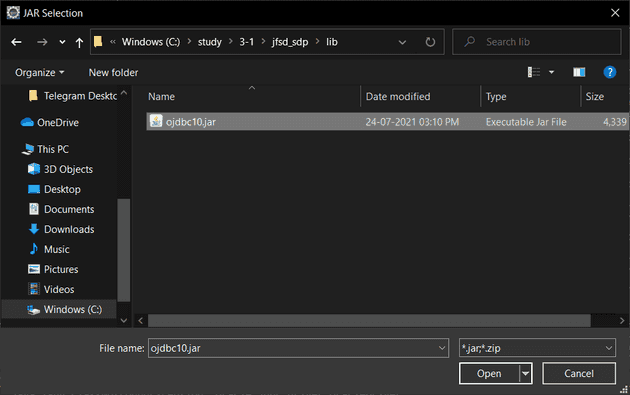
This will open up file explorer select the JDBC driver you have
downloaded.
Thats it we have successfully added our driver to the classpath now make sure you have saved the Main.java file and run the program, It should just work.
