Today we will see how to create a EBS snapshot and restore it to an EC2 instance.
I have created a EC2 instance with a 8GB EBS volume and ssh-ed into it.
I will create a file called test.txt and write some text to it.
Hello there!Now in the ec2 console go to Volumes section
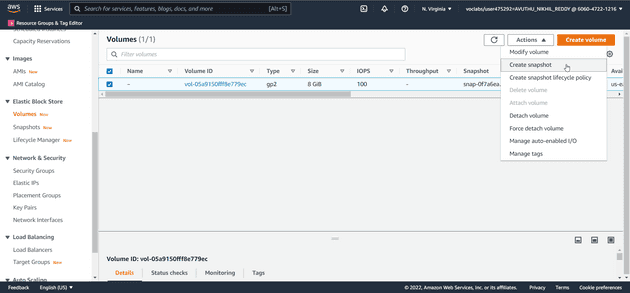
Select your volume and click on actions -> Create snapshot
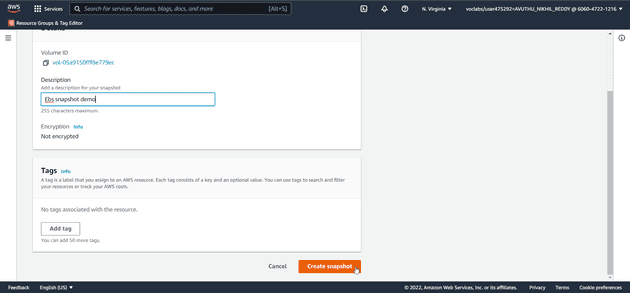
Click on the Create snapshot in the next screen you can give a description to the snapshot if you want.
Snapshot successfully created message will appear at the top of the screen.
You can see the snapshot in the Snapshots section of the console.
Now we will Terminate the instance which will also delete the volume attached to it.
Restoring from EBS Snapshots
Go to the Snapshots section of the EC2 console.
Select the snapshot you want to restore from and click on Actions -> Create Volume from snapshot.
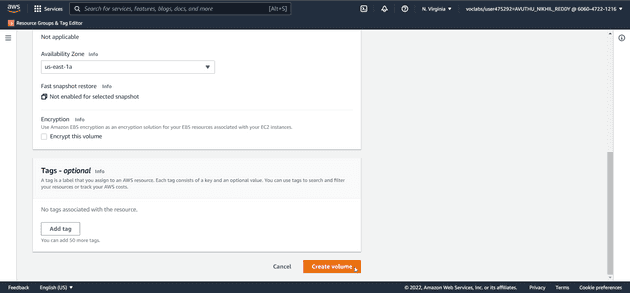
In the Create Volume screen you can increase the size of the volume, Change the volume type and specify the IOPS and also change the availability zone.
You can modify the settings of the volume and then click on Create Volume.
You can see the prompt saying that the volume has been created successfully.
You can see the Successfully created volume in the Volumes section of the console.
Create a new instance and attach restored volume
Go to instances section of the console and click on Launch Instances.
Make sure your subnet is same as the subnet of the volume you are attaching.
and Launch the instance.
Change the root volume to the restored volume
After the instance is launched you can see the instance in the Instances section of the console.
Stop the instance by selecting the instance and click on Actions -> Stop.
wait for the instance to stop and then go to the Volumes section of the console.
Select the already attached volume and click on Actions -> Detach Volume.
After it is detached you can delete the volume to stop incurring charges.
Now select the volume we restored from and click on Actions -> Attach Volume.
Select the instance we stopped in the instance section box.
Change the device name to /dev/sda1 and click on Attach Volume.
Now go back to the Instances section of the console and start the instance that we stopped.
Now if we ssh into the instance we can see the file we created earlier.
We have successfully restored the volume from the snapshot.


